How to Reamp a Guitar at Home
Reamp a dry guitar DI through a real amp: why a reamp box matters, how to wire it, levels, ground lift, and tube-amp safety.
Music Gear Specialist Review Desk
Gear Research & Analysis
ℹ️ Affiliate Disclosure: Music Gear Specialist earns from qualifying purchases through Amazon and other partner links. This doesn't affect our recommendations—we only suggest gear we'd use ourselves.
Search results for “how to reamp guitar” still bounce between a manufacturer how-to, a Wikipedia stub, and forum threads that skip the box entirely. Vintage King and Radial publish the studio version. Home-studio pages on this site teach how to record guitar at home and how to mic a guitar amp. They do not walk the dry track back out of the interface.
That missing step is this page.
This is a research-desk guide, not a bench reamp of a house fleet. The wiring, levels, and impedance notes below come from Radial’s published Reamp® documentation, the ProRMP and JCR specification tables, and the same capture-then-playback workflow those pages describe. Music Gear Specialist Review Desk did not run a scored A/B of every reamp box on the market.
TL;DR: Record a clean DI. Play that track out a line output, not a headphone jack. Put a reamp box between the interface and the amp (or pedals). Start the box level low. Keep a speaker or a rated load on any tube amp. Mic the cabinet the same way you would have on the original take.
What reamping actually is
Reamping is a two-pass recording method.
Pass one captures the performance as a dry, unprocessed guitar signal — a DI track. No amp distortion. No cabinet. No room. You can see every pick attack in the waveform, which is why editors prefer it to a smashed high-gain print.
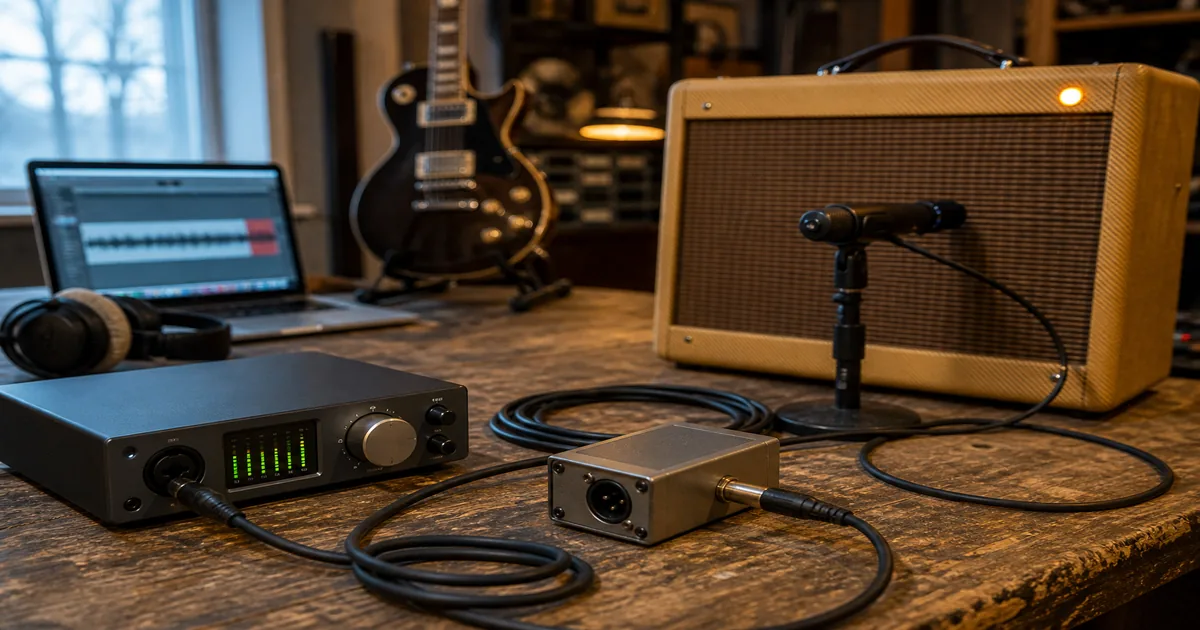
Pass two sends that dry track back into the analog world. The signal leaves a line output, hits a reamp box, then a pedalboard and/or amplifier. You mic the cabinet (or take a load-box line out) and record a new track. The notes do not change. The tone can.
John Cuniberti commercialized the hardware and the Reamp® name. Radial Engineering bought the brand in 2010 and still publishes the main studio walkthrough. The trademark is why product pages say Reamp®. The method is older than the trademark: record dry, decide the amp later.
People also use “reamp” loosely for two other jobs. One is printing a plugin amp sim onto a DI you already have — that stays inside the computer. The other is sending a track through guitar pedals as a hardware insert, which Radial’s EXTC family is built for. This article is the first meaning: dry track → reamp box → real amp or pedals → new recording.
If you are still choosing an interface rather than living with a DI you already tracked, start with the best audio interfaces roundup. Reamping assumes the performance is already on disk.
Why the search results disagree
Older threads treat a reamp box as optional. Newer manufacturer pages treat it as the whole point. Both camps are describing real sessions. They are not describing the same cable.
A guitar pickup is a high-impedance, unbalanced, instrument-level source. A guitar amp input is built for that. A modern interface line output is the opposite: low impedance, often balanced, and sitting at professional line level (the +4 dBu world). Plug that jack straight into an amp and you usually get three problems at once:
- The level is too hot, so the first gain stage clips before the amp “sounds like the amp.”
- The impedance is too low, so the amp’s input does not load the way a pickup does. The result is often thin, bright, and lifeless.
- The ground reference of the computer and the amp share a cable that was never meant to be an instrument lead, which is how a hum shows up the first time you try this at 11 p.m.
A reamp box exists to undo the DI. It is a reverse direct box: balanced line in, unbalanced instrument out, with a transformer or an active buffer doing the impedance and level shift.
Radial’s ProRMP FAQ is blunt about using a regular DI backwards: a DI transformer is wound for a very low instrument-level signal (they cite about −50 dB). The ProRMP transformer is wound to accept a +4 dB balanced line and drop it to about −20 dB or lower so an amp or a pedal sees something in the guitar-level neighborhood. You can force a JDI-style DI to run in reverse with adapters. The FAQ’s point is that you will fight saturation and connectors the whole way.
That is the disagreement. Forum posts that say “just turn the interface down” are describing a level fix. They are not describing the impedance fix. The thin reamp that “kind of works” is the impedance miss.
What a reamp box is (and what a DI is)
Keep the two boxes separate. They look similar. They face opposite directions.
| Direct box (DI) | Reamp box | |
|---|---|---|
| Direction | Guitar → recorder / desk | Recorder → amp / pedals |
| Input | Unbalanced 1/4” instrument | Balanced line (XLR, sometimes TRS) |
| Output | Balanced XLR, mic level | Unbalanced 1/4”, instrument level |
| Job | High-Z to low-Z, short-to-long cable | Line level to instrument level, restore high-Z |
| Typical extra | Pad, ground lift, thru to amp | Level, ground lift, polarity |
A Hi-Z instrument jack on a Scarlett-class interface already does the inbound DI job for a short home-studio cable. That is why most bedroom sessions never buy a standalone active DI box. The outbound job is different. The interface does not grow a guitar-level output just because the input was Hi-Z.
Published Radial numbers, copied from the spec tables rather than measured here:
| ProRMP | Reamp JCR | |
|---|---|---|
| Circuit | Passive, transformer isolated | Passive, transformer isolated (Cuniberti circuit) |
| Frequency response | 20 Hz–20 kHz (+0/−1 dB) | 20 Hz–20 kHz (±1 dB) |
| Input impedance | 1,600 Ω | 1,800 Ω |
| Output impedance | 1,850 Ω | 4.8 kΩ |
| Max input | > +26 dBu | +26 dBu |
| THD | 0.003% | 0.001% @ 1 kHz / 0 dBu |
| Power | None | None |
| Extra | Level, ground lift, polarity | Level, ground lift, polarity, HPF/LPF, mute, XLR + TRS in |
The JCR is the original studio circuit with a custom transformer and a mute that lets you kill the amp while you move a mic. The ProRMP is the smaller, cheaper sibling Radial describes as a scaled-down JCR. Either one is a reamp box. A $15 “DI with a pad” is not a substitute just because the jacks look right.
Active units such as the Radial X-Amp add a powered buffer and a second isolated output so you can feed two amps without a ground-loop fight. That is a feature, not a requirement for a first home reamp.
Radial ProRMP reamp box
Capture the DI so the second pass is worth doing
A reamp is only as good as the dry track. Garbage in still prints as garbage, just through a nicer cabinet.
The simple home-studio capture
- Plug the guitar into the interface instrument / Hi-Z / INST input, not a line jack.
- Disable any input pad, Air, vintage, or saturation button you will not want baked into every future amp.
- Record at 24-bit. Leave peaks around −18 to −12 dBFS on the loudest hits. You need headroom, not a bounced-to-the-rails DI.
- Monitor with an amp sim or a low-latency headphone mix so the performance has feel. The sim is a cue. It is not the keep.
That Hi-Z path is enough for most apartments. It is the same advice as the home guitar recording guide. The difference is intent: you are keeping that track forever, not treating it as a scratch that the sim will replace.
The split capture (amp now, options later)
If you want to play through a real amp while still banking a dry track:
- Guitar into a DI box input.
- DI thru (or parallel out) to the pedalboard / amp.
- DI XLR to a mic pre on the interface.
- Record the DI on one track and the mic’d amp on another.
Radial’s walkthrough prefers an active DI such as the J48 for this split because the thru keeps the guitarist hearing a real amp, and the XLR lands at mic level so the interface preamp does the gain work. You do not need that box if you are only going Hi-Z into the computer. You do need it if the player refuses to track without the cabinet in the room.
Do not print overdrive, compression, or cab simulation onto the keep DI unless you are sure you will never want them off. A little dirt on the cue mix is fine. Dirt on the archived track is a decision you cannot undo.
Playback: the actual reamp chain
This is the part most “I tried reamping and it sounded awful” threads skip.
Cables and jacks
- In the DAW, assign the dry DI track to a line output that is not your monitor pair if the interface has one. On a 2×2 box you will steal the speaker output for the reamp box and monitor on headphones, or you will work offline as Radial describes.
- Run a balanced cable from that line output to the reamp box input. XLR-to-XLR is the ProRMP default. The JCR also accepts 1/4” TRS. Do not use a guitar TS cable here and hope the sleeve sorts it out.
- Run a normal instrument cable from the reamp box 1/4” output to the amp input, or to the front of the pedalboard.
- Mic the cabinet. An SM57 on the grille is the default. Record that mic to a new track. Leave the original DI armed only as the source, not as a second keep unless you want another dry copy.
Guitar → (already recorded) → DAW line out → reamp box → amp or pedals → speaker → mic → interface mic in → new track.
Set the box, then the amp
Radial’s comparing-reampers page and both spec sheets put a level control on the box for a reason. The box is not a set-and-forget pad.
- Turn the reamp-box level down.
- Set the amp the way you would for a guitar plugged in — not brighter, not dimed to “make up” for a shy feed.
- Raise the box level until the amp’s input behaves like a guitar: the gain knob still has travel, the clean channel still cleans up, a Tube Screamer still boosts instead of smearing.
- If the amp is already slamming with the box at minimum, drop the DAW clip gain or the interface output. Do not solve a hot line with the amp’s master.
A useful reality check: unplug the reamp box and plug the guitar straight into the same amp input. Play. That is the feel you are chasing. Then plug the box back in and match the apparent loudness and the way the front end bites. If the reamp is brighter and flatter than the guitar, the level is probably still too high or you are coming out of a headphone jack.
Ground lift and polarity
The transformer in a passive reamp box already breaks the pin-1 path that turns a USB interface and a guitar amp into a ground loop. Use the ground-lift switch if a 60 Hz (or 50 Hz) hum appears the moment the box hits the amp. Lift is for the audio ground, not for pulling the third prong off the amp.
The JCR and ProRMP both publish a 180° polarity switch. That is for matching a reamped cab to another mic or to a residual DI blend, not for “making it fatter.” Flip it only when you are combining sources and one side sounds hollow.
The 2×2 interface limit
A Scarlett 2i2-class unit has two analog outputs. Those are usually the speakers. If you patch them into the reamp box, the monitors go dark. Radial’s own how-to says you then work in takes: send the DI, record the mic, listen, move the mic, repeat. It works. It is slower.
A 4-out interface (or any box with a dedicated line pair) lets you keep speakers on outputs 1–2 and park the reamp feed on 3–4. That is the only hardware upgrade that changes the workflow. You do not need more preamps to reamp one guitar.
Tube-amp safety while you “turn it up for tone”
Reamping makes it easy to leave an amp sitting at the volume that sounds like the record, because you are not holding a guitar. That is also how people cook output transformers.
- A tube head or combo must see a speaker or a rated load box on the speaker jack. No exceptions for “I’m only using the preamp” unless the manufacturer documents a safe preamp-only path.
- A load box plus a cabinet impulse is the apartment version of pass two. The amp still works. The room does not.
- The effects-loop send is a preamp tap, not a dummy load. Do not unplug the speaker and call the send a silent reamp.
- Speaker-level never goes into a reamp box, an interface, or an effects return. The reamp box is a small-signal device. Radial lists ProRMP max input above +26 dBu — that is line, not a speaker out.
If the goal is a quiet print and you do not own a load box, reamp into pedals and a modeler, or reamp into a low-watt practice amp you can actually mic at living-room volume. The amp wattage guide is the volume conversation. This page will not talk you into diming a 50-watt half stack at midnight.
Pedals, amps, and the three useful layouts
Amp only. Reamp box into the front input. Pedals off. This is how you A/B cabinets and mic placements on the same take.
Pedals into the amp. Reamp box into the first pedal, then the board into the amp as usual. Wah, fuzz, and vintage-style circuits that want to see a pickup will now see the reamp box’s output impedance instead. That is closer to a guitar than a line out is. It is not identical to a pickup. If a Fuzz Face that sounded right on the original take turns brittle, the box is still a better starting point than a raw line out, but you may need the guitar in your hands for that circuit.
Pedals only. Reamp box into a pedal, pedal into an interface line or instrument return (or into an EXTC-style loop). Use this to print a tape echo, a real spring, or a drive you do not own as a plugin. You are not using the power amp at all.
Time-based effects belong in the same place they belong on a live board: after the gain, often in an effects loop, so repeats do not get re-distorted. The signal-chain order page covers that split. Reamping does not change the physics. It just lets you try the split after the notes are finished.
Plugin “reamp” versus hardware reamp
Printing Neural DSP, a NAM capture, or a stock DAW amp sim onto a DI is useful. It is not what this article is for. Software reamp is recallable, silent, and good enough for a huge share of records. Hardware reamp is for the days the sim is not the sound, or you want the specific cabinet and room you already own.
A honest split:
| In-the-box amp sim | Hardware reamp | |
|---|---|---|
| Recall | Instant | You re-do the take |
| Volume | Silent | Cabinet or load box |
| Feel while tracking | Cue sim only | Original pass can be sim or real amp |
| Unique factor | The preset | Your amp, mic, and room |
| Editing | Always | Performance is locked; tone is not |
Keep the DI even when you love the sim. That is the whole insurance policy. The hardware pass is optional until a mix proves you need it.
Mistakes that make a reamp sound like a cheap sim
Headphone output into the amp. Headphone outs are not line outs. They are amplified, often DC-coupled poorly for this job, and they sit at the wrong level. Use a line output.
TS guitar cable from a balanced line jack. You will still hear guitar. You will also hear whatever the unused half of the balanced pair was doing. Use XLR or TRS into the box.
Clipping the DI “so it sounds aggressive.” Distortion on the dry file is permanent. The amp cannot un-clip a square wave.
Matching loudness by ear with the DAW fader on the mic track while you raise the box. You will chase yourself. Set the box against a real guitar first. Then record. Then ride the printed track.
Leaving the speaker unplugged. Covered above. It is the expensive mistake.
Blending DI and reamp out of phase. If you stack the dry track under the cab for click and weight, flip polarity on one side and listen for the hollow midrange. The JCR’s polarity switch exists for this check.
Expecting a 2×2 session to feel like a studio with a cue mix. It will not. Budget the extra time or borrow an interface with more outputs.
A compact decision path
- Do you already have a clean DI? If no, record one before you touch the amp. If the only file is a printed sim, you can still reamp that file, but you are reamping the sim’s output, not the guitar.
- Do you own a reamp box? If no, that is the purchase. A passive ProRMP-class box is the usual first one. If yes, skip the “maybe a DI backwards” experiment.
- Is the amp a tube amp? Confirm speaker or load before power. Then patch the box.
- Is the interface 2×2? Plan offline takes, or move monitors to headphones.
- Are you chasing a pedal or a cabinet? Patch accordingly. Do not do both until one of them is right.
Default recommendations, stated as defaults:
- First home reamp, one amp, one mic: passive reamp box, SM57, instrument cable, line output. No extra toys.
- Apartment, tube amp, neighbors: same box into a load box and an IR, or into a low-watt combo you can actually turn up a little.
- Already happy with amp sims: keep recording DIs anyway. The reamp box can wait until a mix argues with the plugin.
Sources
- How to Reamp® for a Perfect Tone (Radial, 2017): capture with a DI and thru; play back through a Reamp® box; 2×2 interface limitation; Radial purchased the Reamp® brand from John Cuniberti in 2010.
- ProRMP specifications: passive transformer circuit; 20 Hz–20 kHz (+0/−1 dB); 1,600 Ω in / 1,850 Ω out; > +26 dBu max input; no power.
- ProRMP FAQ: +4 dB line in, about −20 dB or lower to the amp; why a DI transformer is the wrong winding; passive vs active (X-Amp).
- JCR specifications: Cuniberti passive circuit; 1,800 Ω in / 4.8 kΩ out; HPF/LPF, mute, XLR and TRS inputs.
- Comparing Reampers: ProRMP as compact passive unit with level and ground lift; JCR as the original circuit with mute and filters.
Related reading on this site
- How to record guitar at home — the DI capture this page assumes
- How to mic a guitar amp — the second-pass microphone
- Best mics for recording electric guitar
- Shure SM57 review
- Fix guitar recording latency
- Eliminate ground loops in a production rig
- Guitar amp wattage explained
- Pedalboard signal chain order
- Best audio interfaces
- Focusrite Scarlett 2i2 review
- Getting started recording at home
- Recording gear hub

Music Gear Specialist Review Desk
Research-based reviewsResearch-based reviews · Manufacturer specs · Verified owner feedback
We review guitars, amps, pedals, and recording gear the honest way: spec sheets, published measurements, and the collected experience of working musicians and verified owners.