How to Record Guitar at Home
Recording the guitar at home in 2026: direct input vs amp mic, audio interface setup, beginner gear, DAWs, amp sims, levels, and acoustic mic placement.
Mike Reynolds
Professional Guitarist & Audio Engineer · 20+ years
ℹ️ Affiliate Disclosure: Music Gear Specialist earns from qualifying purchases through Amazon and other partner links. This doesn't affect our recommendations—we only suggest gear we'd use ourselves.
Electric guitars are outselling acoustics at a 2:1 ratio in 2026, driven partly by the explosion of home recording (Guitar Muse, 2025). The tools to record professional-sounding guitar at home have never been cheaper or more accessible, but the sheer number of options (interfaces, DAWs, plugins, microphones) overwhelms most beginners.
Let’s strip it down to what you actually need.
TL;DR: Buy a Focusrite Scarlett 2i2 ($170), download a free DAW (GarageBand on Mac, BandLab on Windows), and plug your guitar directly into the interface. Free amp simulation plugins make direct input sound indistinguishable from mic’d amps for 95% of listeners. Total cost: $170 if you already have a computer and guitar.
Recording the Guitar: Quick Start
For most home players, recording the guitar means plugging the guitar into an audio interface, opening a DAW, setting the interface input to instrument mode, recording a clean direct-input track, and adding amp simulation afterward. This is the easiest path because it avoids loud amp volume, poor room acoustics, and inconsistent microphone placement.
Use this decision path:
| Goal | Best recording method | Gear priority |
|---|---|---|
| Electric guitar practice clips | Direct input plus free amp sim | Audio interface and headphones |
| Metal or high-gain rhythm tracks | Direct input plus amp sim | Low-latency interface and tight monitoring |
| Acoustic guitar demos | Condenser mic at the 12th fret | Microphone, XLR cable, quiet room |
| Tube amp tone at home | Mic a small amp or use a load box | Dynamic mic, interface, room control |
| Silent apartment recording | Direct input only | Interface, headphones, amp sim |
If you are buying gear, start with the best audio interfaces comparison, then add studio headphones before studio monitors. Acoustic players should also compare the best guitar microphones.
The Two Ways to Record Guitar
Every guitar recording method falls into one of two approaches. Understanding which one fits your situation saves you from buying gear you do not need.
Method 1: Direct Input (DI) + Amp Simulation
How it works: Guitar → Cable → Audio Interface → Computer → Amp sim software
Your guitar signal goes straight into your computer as a clean, unprocessed signal. Software (amp simulators) then models the sound of real amps, cabinets, and effects. Your computer becomes your entire rig.
Pros:
- Silent recording, perfect for apartments and late-night sessions
- Consistent results, no room acoustics to deal with
- Unlimited re-amping, change your amp sound after recording
- Cheapest setup, just need an interface + free software
- Most beginner-friendly approach
Cons:
- Purists argue it does not capture amp “feel” (debatable in 2026)
- Requires a computer capable of running audio software
Method 2: Microphone + Amplifier
How it works: Guitar → Amp → Microphone → Cable → Audio Interface → Computer
Your guitar plays through a physical amp, and a microphone captures the sound from the speaker. This is the traditional studio recording method.
Pros:
- Captures the authentic interaction between guitar, amp, and room
- Many players find it more inspiring to play through a real amp
- The “gold standard” for professional recordings
Cons:
- Requires a good amp ($200+) and microphone ($100+)
- Loud, not apartment-friendly
- Room acoustics matter, cheap rooms sound cheap
- Mic placement is an art that takes practice
Our recommendation for beginners: Start with Method 1 (DI + amp sims). Modern amp simulation software, like Neural DSP, Amplitube, or free options like GarageBand’s built-in amps, sounds remarkably close to the real thing. You can always add a microphone and amp setup later when you’ve learned the recording basics.
Essential Gear: The $170 Recording Setup
Here is the minimum gear to start recording guitar at home today:
| Item | Our Pick | Cost |
|---|---|---|
| Audio Interface | Focusrite Scarlett 2i2 (4th Gen) | $170 |
| DAW Software | GarageBand (Mac) / BandLab (Free) | $0 |
| Instrument Cable | Fender Professional 10’ | $25 |
| Headphones | Audio-Technica ATH-M20x | $50 |
| Total | $245 |
If you already have headphones and a cable, you are spending $170. That’s it.
Starter buying links:
- Focusrite Scarlett 2i2 audio interface for direct guitar, vocals, and microphone recording.
- Closed-back studio headphones so you can monitor without speaker bleed.
- Instrument cable for recording guitar if your current cable crackles or hums.
- Condenser microphone for acoustic guitar if you are recording acoustic instead of DI electric.
Why the Focusrite Scarlett 2i2?
The Scarlett 2i2 is the world’s best-selling audio interface for good reason:
- Two inputs, record guitar + vocals simultaneously, or stereo mic a guitar
- 192kHz/24-bit, studio-quality audio conversion
- Low latency, play through amp sims without noticeable delay
- Bus-powered, no power supply needed, just a USB-C cable
- Bundled software, comes with Ableton Live Lite and several plugins
It’s the interface that professional producers recommend to beginners, and many pros still use it in their own studios.
Software You Need (Free Options)
DAW (Digital Audio Workstation)
Your DAW is the software that records, edits, and mixes your audio.
| DAW | Platform | Cost | Best For |
|---|---|---|---|
| GarageBand | Mac | Free | Beginners, built-in amps, effects, loops |
| BandLab | Any (browser) | Free | Windows beginners, cloud-based, easy sharing |
| Audacity | Any | Free | Simple recording, no MIDI, basic editing |
| Reaper | Any | $60 | Best value, professional features, fair price |
| Logic Pro | Mac | $200 | Pro step-up from GarageBand, same interface |
| Ableton Live | Any | $99+ | Electronic/loop-based production |
Amp Simulation Software
These plugins model real amplifiers and make your DI signal sound like it is coming through a cranked tube amp:
Free options:
- GarageBand amp models (Mac), surprisingly good, zero additional cost
- Amplitube CS (free version), 4 amps, 5 effects, limited but functional
- LePou Plugins, free amp sim collection, open-source
Paid options worth buying later:
- Neural DSP ($99-$199/plugin), the gold standard in amp modeling
- Amplitube 5 ($150), massive collection of modeled amps
- Line 6 Helix Native ($400), studio version of the Helix multi-effects
Step-by-Step: Your First Home Recording
Here is the exact process to go from zero to a recorded guitar track:
Step 1: Connect Your Interface
- Plug the Scarlett 2i2 into your computer via USB-C
- Install the Focusrite drivers (download from focusrite.com)
- Set the Scarlett as your audio output in System Preferences/Settings
Step 2: Open Your DAW
- Launch GarageBand (Mac) or BandLab (browser)
- Create a new project
- Add a new audio track (select “guitar” or “audio input”)
- Set the input to your interface’s Input 1
Step 3: Connect and Set Levels
- Plug your guitar into Input 1 on the Scarlett using a standard instrument cable
- Press the INST button on the Scarlett (enables Hi-Z mode for guitars)
- Play your loudest part and adjust the gain knob until the signal peaks around -12dB to -6dB
- If the halo ring turns red, you are clipping, turn the gain down
Step 4: Add Amp Simulation
- In GarageBand, select an amp preset from the library (try “British Invasion” for rock)
- In BandLab, add the built-in amp simulator effect to your track
- Adjust settings to taste, do not obsess, you can change everything later
Step 5: Press Record
- Hit the red record button
- Play your part
- Hit stop when done
- Listen back through headphones
Congratulations, you just made your first home recording.
Recording Acoustic Guitar
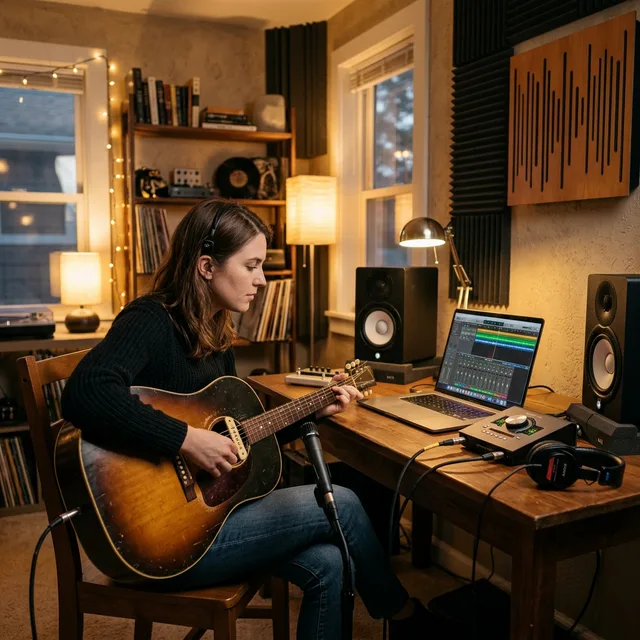
Acoustic guitar requires a microphone because DI signals from acoustic pickups sound thin and artificial in a mix. Here is the basic approach:
What You Need
- Condenser microphone: Audio-Technica AT2020 ($100) is the go-to budget option
- XLR cable: Any standard XLR cable ($10)
- Mic stand: A basic boom stand ($20)
Mic Placement (The Easy Way)
Point the microphone at the 12th fret (where the neck meets the body), about 6-12 inches away from the guitar. This captures a balanced blend of the guitar’s bass (from the soundhole) and treble (from the strings).
Common mistakes:
- ❌ Pointing the mic at the soundhole, too boomy
- ❌ Mic too close, sounds unnatural and proximity effect adds excessive bass
- ❌ Mic too far, picks up room noise and loses detail
Common Guitar Recording Problems
Clipping: If the interface light turns red or the waveform looks squared off, lower the gain. A clean recording that peaks around -12 dB is easier to mix than a loud distorted input.
Latency: If the guitar feels delayed, lower the buffer size in your DAW, close other apps, and use direct monitoring when possible. Our guitar recording latency fix guide walks through the common driver and buffer settings.
Thin DI tone: Direct input sounds plain before amp simulation. Add an amp sim and cabinet model before judging the tone.
Noisy acoustic recording: Move away from computers, HVAC noise, and reflective walls. A better mic will not fix a loud room.
FAQ
What is the best way to start recording the guitar?
The best way to start recording the guitar is direct input into a USB audio interface, then using amp simulation software in a DAW. This setup is quiet, affordable, repeatable, and easier for beginners than placing a microphone in front of a loud amplifier.
Can I record electric guitar without an amp?
Yes. Plug the electric guitar into an audio interface, turn on instrument or Hi-Z mode, record a clean DI track, and use amp simulation software for the amp and cabinet sound. This is now the default home-recording workflow for many guitarists.
Our Verdict
Home guitar recording in 2026 is accessible to anyone with $170 and a computer. Start with direct input and free amp simulation, you’ll get 90% of the way to a professional sound. Add a microphone for acoustic recording, and upgrade to paid software when you’ve outgrown the free options.
The most important step? Just start recording. Your first recordings will not sound like professional albums. That’s fine. Recording is a skill that improves with practice, just like playing guitar.
Related articles: Getting Started with Home Recording, Recording Gear Hub, Best Guitar Amps for Home and Stage, Best Acoustic Guitars for Beginners
- Best Guitar Cables, reliable cables for your signal chain
Mike Reynolds
20+ years experienceProfessional guitarist · Studio engineer · Guitar instructor (2006–present)
Mike Reynolds is a professional guitarist, studio engineer, and guitar instructor based in Austin, TX. He has recorded with regional acts across rock, blues, and country, and has been teaching private guitar lessons since 2006. Mike built his first home studio in 2008 and has since helped hundreds of students find the right gear for their budget and goals.